Recipes

Roasted Tomato Sauce

Its been a fantastic summer here for tomatoes and my first year of growing them in a greenhouse has been far more successful than I had anticipated – we have so many!  There’s a limit to how many fresh tomatoes one family can eat and friends and neighbours have had their fill. Even though we are now well into autumn, the plants keep on providing. Not wanting to waste any of these delicious fruits we have been finding new ways of cooking them.

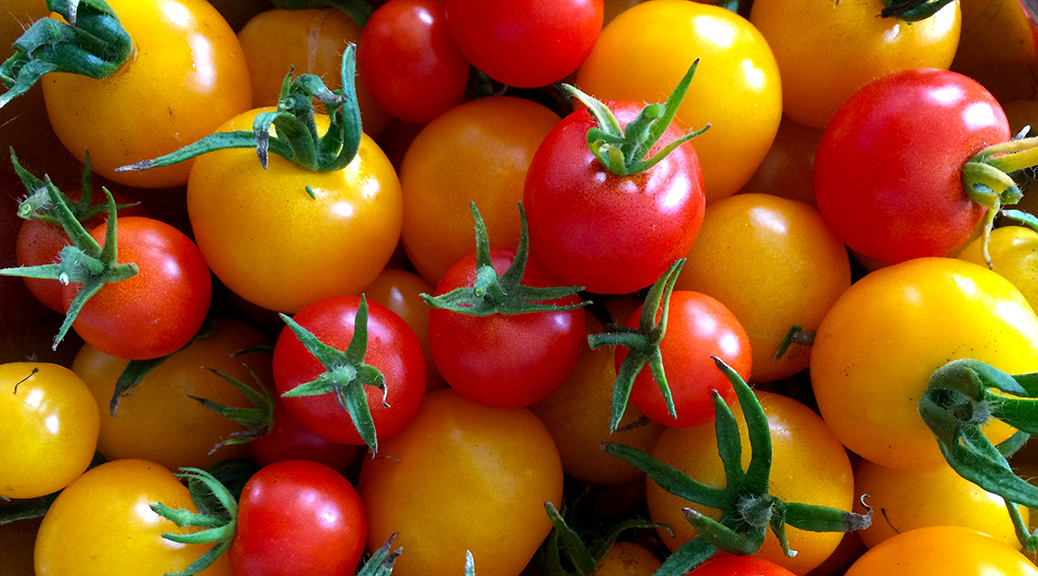
This is our favourite recipe (so far) for our glut of tomatoes. The sauce can be eaten straight away and also freezes well for a future meal.

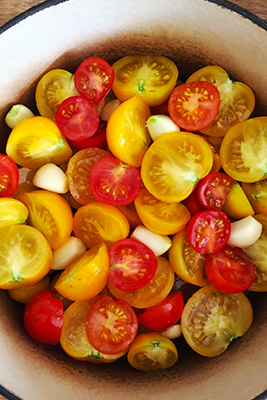
• Slice the tomatoes in half and place them in a layer at the bottom of an oven proof pan. You can make several layers, depending on the amount of tomatoes you have and the size of your pan.

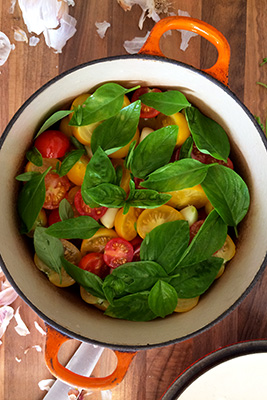
• Add several cloves of garlic to each layer, along with some chunks of butter and sprinkle salt over. If you have some fresh basil leaves, they can be added too.

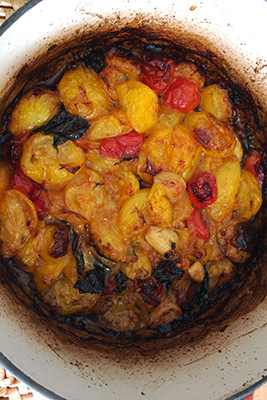
• Place in oven at about 180ºC for about an hour (or longer) until they start to caramelise. It is a good idea to open the oven door occasionally to let moisture out and to give the tomatoes an occasional stir.

• When you think that they are roasted enough, remove from oven and allow to cool a little.

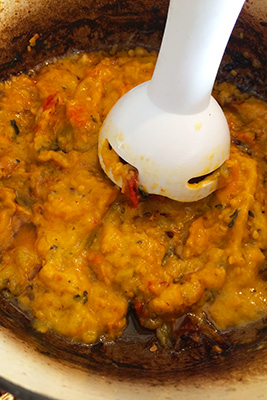
• Using a blender (I have a hand one) blitz the tomato mixture. If there are tough skins still present then you can pass it through a sieve to create a smooth sauce.

Note: this sauce is fairly concentrated – a little goes a long way.

• Serve over your favourite pasta with a sprinkling of cheese.

Yum.


Muesli Slices

mueslionboard
As most muesli bars contain nuts and I have an anaphylactic (a severe allergy to nuts) son, Master Rambles sometimes feels left out when other children have muesli bar ‘treats’ in their lunch boxes. Recently he saw an advert for a new range of ‘nut free’ muesli bars and asked if I could buy some for him. I saw them in the supermarket and, without really thinking it through, bought them. It was only when I got home that I read the ingredients and discovered that these ‘healthy’ bars were full of preservatives (which is another ingredient Master Rambles has to avoid). Junior Rambles and I tried them, and they were fairly tasteless anyway, and I wasn’t too impressed with the excessive amount of packaging.
muesliingredients
To try to alleviate Master Rambles’ disappointment I decided to make some of our own and, slightly to my surprise, my first attempt was a success. While it would be fine to use supermarket ingredients, I bought organic and preservative-free ingredients from a local health shop – slightly more expensive than the supermarket but all the ingredients together still cost less than the packaged muesli bars!

So here is my, very simple, recipe for nut-free, preservative-free and packaging-free muesli slices.

    • Melt 100g butter in a small pan with 75g of golden syrup and 50g of brown sugar.
mueslimix
    • Meanwhile, in a mixing bowl, combine 100g wholemeal self-raising flour, 80g of rolled oats, 50g of sulphite-free dried apricots (chopped), and 25g each of pumpkin seeds, sunflower seeds and preservative-free shredded coconut.
    • When the butter and sugar mixture has melted and dissolved, stir through the dry ingredients.
mueslicooked
  • Transfer the mixture into a baking pan (mine is 8″x8″) and cook at 170C for about 20 minutes.
  • Once out of the oven let the mixture cool for about 10 mins before turning out onto a cooling rack.
  • Allow to cool completely before cutting into desired shapes and sizes. It is difficult to cut when hot as it is very crumbly (I have tried, and failed).


Perfect in a lunch box, or enjoyed anytime with a cuppa!

mueslicut

Vanilla Sponge Cake with Pear and Cream Filling

This is not actually my own original recipe, I ‘borrowed’ it from Mr Rambles. I have had several requests for the recipe recently, so here it is, reproduced by kind permission. Thank you Mr R.

When Master Rambles was on his strict elimination diet he couldn’t enjoy Mr Rambles’ lemon sponge cake, so I changed it to a vanilla sponge and filled it with cream and the only fruit he was allowed, pears. It was an instant hit, and has now become our family’s favourite cake. For a special occasion, for a not so special occasion, or for when it just feels like a cake sort of day!


cakepearslices
  • Cream together 125g softened butter and 220g castor sugar with a teaspoon of vanilla essence
  • Add 2 eggs to the mixture and beat
  • Add 75g of self-raising flour and mix until smooth
  • Add another 150g of self-raising flour and a pinch of baking powder
  • Mix until smooth
  • Pour in 125mls of milk and mix until smooth
  • Divide into two lined 8″ cake tins and cook at 150C for about 40 mins (until a knife comes out clean)
  • Carefully remove from tins and place on a cooling rack
    cakeready
  • When the cakes are cool enough, add some whipped fresh cream to one half, and top with sliced pears. I use very ripe or tinned ones.
  • Place the other half on top
  • Enjoy. Goes down exceptionally well with a cup of tea!
    eatcake2

Pear and Oat Muffins

A couple of years ago, Master Rambles was on a special elimination diet and the only fruit he was allowed to eat was pears. This humble fruit was tried, tested, and re-invented in many of our recipes. Pear and oat muffins were the most successful and proved popular with the whole family. They have also become a firm favourite with my fellow Thursday morning Stand Up Paddle group.

I have had a few requests for the recipe, so here it is, enjoy!

cookedmuffins
  • Cream together 150g of softened butter and 80g of brown sugar with 1tsp of vanilla essence
  • Add 100g of rolled oats and stir through
  • Now add 225g of self-raising flour (I use wholemeal) with
    2 beaten eggs and 3-4 pears (peeled and chopped into small chunks) and stir through
    Note: extra/over ripe and juicy pears are best.
  • Divide the mixture evenly between cases in a standard 12 hole muffin tray
  • Sprinkle the top of each muffin with a little brown sugar
  • Cook at 190C for about 25 minutes
  • Check that they are crisp and nicely browned on top, then remove from tray and cool on a rack

papercut
You can use pre-bought muffin/cup cake cases, but making your own (out of baking paper) is cheaper and the finished cases can go straight into the compost. Cut 12 squares out of the baking paper.

paperfold
Next, fold the squares in half twice, then open them out and push them into the holes. Carefully spoon your muffin mixture into each one.

Roast Pumpkin Soup

  • Wrap half a medium sized pumpkin, with the seeds removed, and about 6 cloves of garlic (all skin on) in foil to make a parcel.
  • Put in a hot oven for an hour, remove and allow to cool. Open the parcel and remove the pumpkin skin.
  • Put a tablespoon of olive oil in a pan and add one or two chopped onions, cook gently until transparent. Squeeze the garlic out of their skins into the onions and add the pumpkin along with some chopped rosemary.
  • Add 750ml of vegetable stock and simmer for 20 minutes. Blitz and pass through a fine sieve.? Check seasoning.
  • Serve hot with a dash of balsamic vinegar, a swirl of soured cream and a sprinkling of lemon zest.


Delicious with crusty home made bread.

Vanilla Biscuits

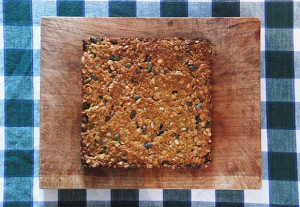
These biscuits are a firm family favourite, good for the school ‘morning tea’ box or a snack at the beach. They are quick and easy to make and always popular when shared with friends!

  • Beat 125g of butter with 80g of brown sugar until creamy and add 1tsp of vanilla essence
  • Mix in 50g of self-raising and 50g of plain flour (wholemeal).
  • Add 2 tbsp of milk and, when mixed, a further 65g of self-raising flour and 50g of plain flour
  • Mix into a dough.
  • Make balls of the dough (about 24) and place on a non-stick baking tray.
  • Press the back of a fork onto the balls to squash them into biscuit shapes.
  • Cook at 160C for about 20 mins (longer makes them crispier).

Cool on a rack and enjoy with a cup of tea.