Compost

Composting Continues

Once we had moved into our new house, I couldn’t bear to throw away any vegetable peelings etc., so I automatically started a compost bowl in the kitchen. As it was summer and keeping an open bowl in the kitchen indefinitely wasn’t going to be a good idea, I quickly had to sort out somewhere to put compost in the garden. I kept checking the local ‘Freecycle’ group and eBay in the hope someone would have a compost bin they no longer wanted – but initially had no luck. I looked at compost bins for sale in local hardware shops, but they weren’t what I wanted and were also rather pricy.

I decided to try something new (and cheaper) by buying a plastic rubbish bin, with a tight fitting lid,  then drilled several holes in the bottom and around the lower edges, and I had a new homemade compost bin! I really had no idea what I was doing – I’d looked up some ideas on-line and seen differing ideas and opinions on whether holes were required. I decided it was worth a go.

I don’t know whether it was because the weather is wetter in England than Australia, or because of the nature and shape of the bin, but to start with my compost was very wet and cloggy and formed ‘lumps’; it was nothing like the texture I had in Australia. Perhaps, not having the wider bottom design (as on most commercial compost bins) may have caused the problem.

I added some compost worms, used my trusty turner and muddled on. In the meantime I found a second hand compost bin for sale nearby. When I went to collect it was rather larger than I had realised or wanted (I just managed to fit it in the car) but I was pleased to have it and started putting the compost in that one, while l continued to turn the compost in the ‘bin’. It did eventually, after the winter, resemble an acceptable ‘compost’ which I used in the garden.

I now have three identical compost bins on the go (Christmas present – thank you Granny and Grandpa Rambles!) which are working brilliantly. I still have the ‘bin’ as a back up extra, and although it is a little small and not quite the right shape, it did seem to work as an alternative compost bin.

If you would like to discover what I put in my compost bins, have a look at twitter #thingsIputinmycompost

A Rubbish Conversation turns to Compost

While chatting to some friends recently, over a post paddle boarding coffee and muffin, the conversation somehow turned to what we do/don’t put into our rubbish bins. I have read several articles lately on people who are managing to live almost or completely waste free. Although I can’t claim to have anything like that lifestyle, I have noticed that since my composting habits changed last year (Click here to read ‘The Art of Composting’) we are putting very little in our ‘general rubbish’ wheelie bin and, as any rubbish we do have is dry, we no longer need to use plastic bags. (The recycling bins, however, are always full – despite trying to re-use things first – but that’s another story.)

wheeliebin

One friend said she had been inspired to start composting but she still had a full rubbish bin at the end of every week. Without (I hope) sounding too cheeky, I asked her what was going in her rubbish bin; when she started listing a few things, I said, “Oh, I put most of those in the compost”. There was a little gasp of surprise around the table and the conversation steered onto what you do and don’t or can and can’t put into a compost bin. There seems to be a debate on whether some items can be composted, but when I am asked what I compost, the answer is simple – everything that I think is biodegradable goes into my compost bin. I am no expert here, and if other people want to tell me I am doing something wrong then I am prepared to listen, but I appear to make great compost and have a lot less waste. I have read that, amongst other things, you shouldn’t put citrus, onion skins, cooked food or meat in the compost. It all goes in mine. I imagine that if you have an open compost ‘pile’ then cooked food and meat would attract rats but, I have a sealed bin placed on a tiled base so no rodents can get in. I have read that citrus is poisonous to worms; I have also read that this is a myth. I put citrus in my compost bin and the worms are still there and the citrus turns to compost.

dalekbins
With so much conflicting information out there I am happy to just continue with my methods and self-discover what does and doesn’t ‘work’ in my compost bin.

When the waste breaks down into compost I often find some things that need longer to decompose, e.g. bones and fruit stones; I simply toss them into the ‘new’ compost bin (ideally you should have three bins on the go in rotation). I also occasionally find things that are not biodegradable and have found their way into the compost by accident, such as some plastic packaging or other man-made materials, and I simply remove them before using the compost in the garden.

Inspired by reactions to my composting ways, I have decided to start tweeting a list of “things I put in my compost” (#thingsIputinmycompost). Follow me on Twitter (@rose_rambles) to see how many I come up with!

citruscompost

What do you/don’t you put in your compost? – Comments are welcome.

The Art of Composting

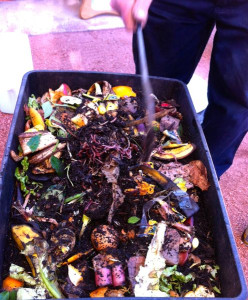
The Eco House and Garden, at my local ‘tip’, Kimbriki Resource Recovery Centre, is a fantastic education centre. It comprises a large building/office and edible garden made almost entirely from reused and recycled materials rescued from landfill. From there a team of eco gardeners run various, free, courses on sustainable gardening practices. Last year I attended ‘The Art of Composting’ course.

compostplate

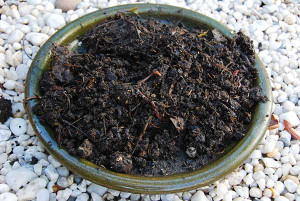
After previous failures and frustrations with composting, I am now managing successfully to produce usable compost from our kitchen and garden waste. I am not, by any means, claiming to be an expert; however, I hope I can help and inspire others to give composting a go. These are the best 7 tips I learnt, enabling me to produce compost efficiently and quickly in a compost bin.

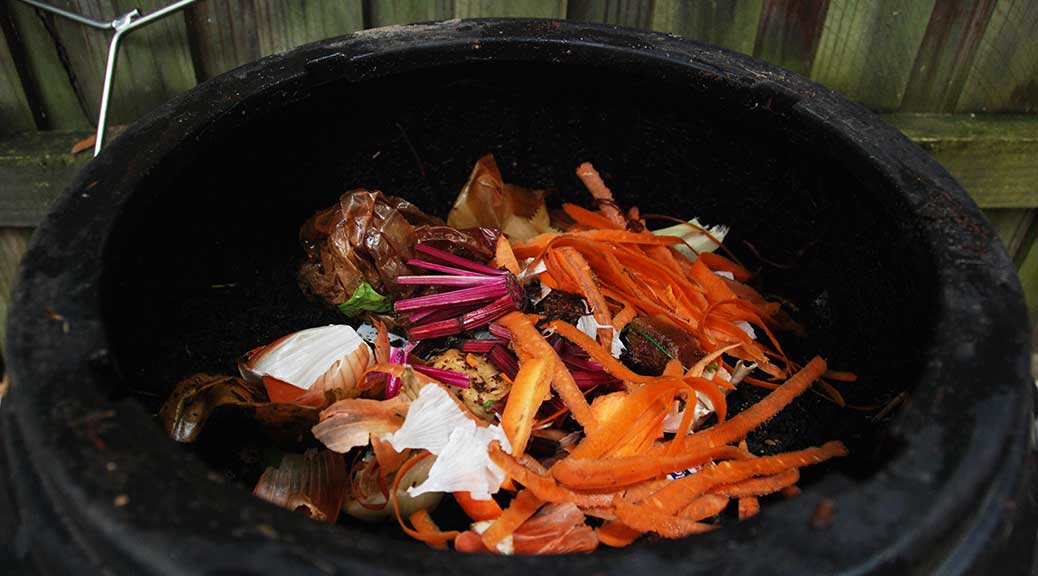
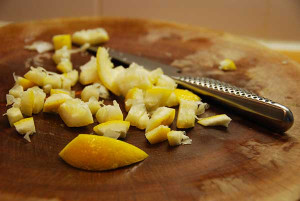
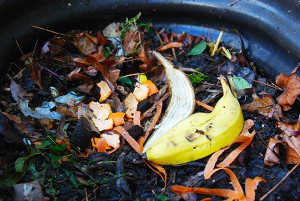
1. Cut up your waste

cutlemonpeel

The smaller the pieces of waste, the quicker they can breakdown. This includes both garden cuttings and kitchen waste. It doesn’t take too long to cut and makes such a difference. I have discovered that certain scraps take much longer than others to breakdown, these include citrus peel and egg shells. I cut up peel into small pieces before putting it in, and I crush egg shells up into tiny pieces.
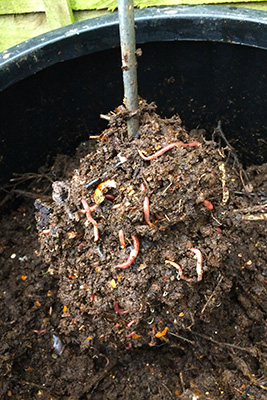
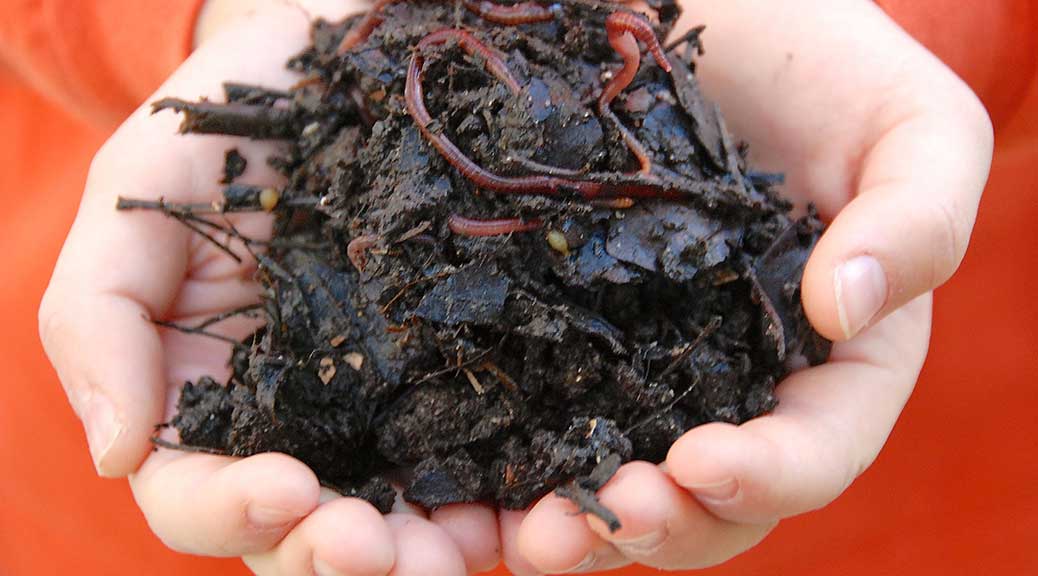
2. Add worms

My neighbour gave me some worms from his compost bin, but I also discovered that when I started a second compost bin the worms just appeared. (If you build it they will come?) The worms help breakdown the waste and are an essential part to successful composting, so if you don’t have any, you need to get some. You only need a few as they breed very quickly. Apparently they stop reproducing when there are enough worms for the space they have, so it isn’t possible to become overpopulated with worms. Clever fascinating creatures! A quick internet search for ‘composting worms’ will help you buy worms (apparently they can be sent by mail – amazing!) so if you are not lucky enough to have an obliging composting friend or neighbour, this might be the way to go.

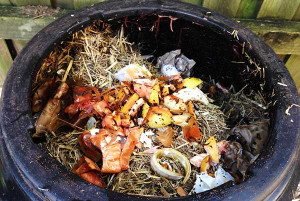
3. Add equal amounts of ‘green’ and ‘brown’ waste

freshcompost

I keep a pile of dry leaves next to the compost bin so whenever I chuck in my kitchen scraps I add the same amount of leaves. If you put in too much of one type of carbon (eg grass cuttings) it doesn’t breakdown as well and can get smelly; a good balance is really important.

4. Diversity is the key to a good compost recipe

Adding a diverse amount of materials into the compost bin means the compost will contain more nutrients. Egg shells are good for adding calcium, but you may not realise that you can put human hair and nail clippings into the compost bin. Animal manure is also good, I put our chicken droppings in when I clean out their coop, and I often add some cow manure (which can usually be bought from garden centres).
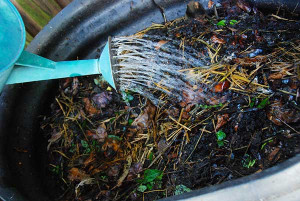
5. Keep it moist

watercompost

Compost needs to be kept moist to remain active and for the worms to stay alive. I usually add a watering can of water every time I top up with waste.

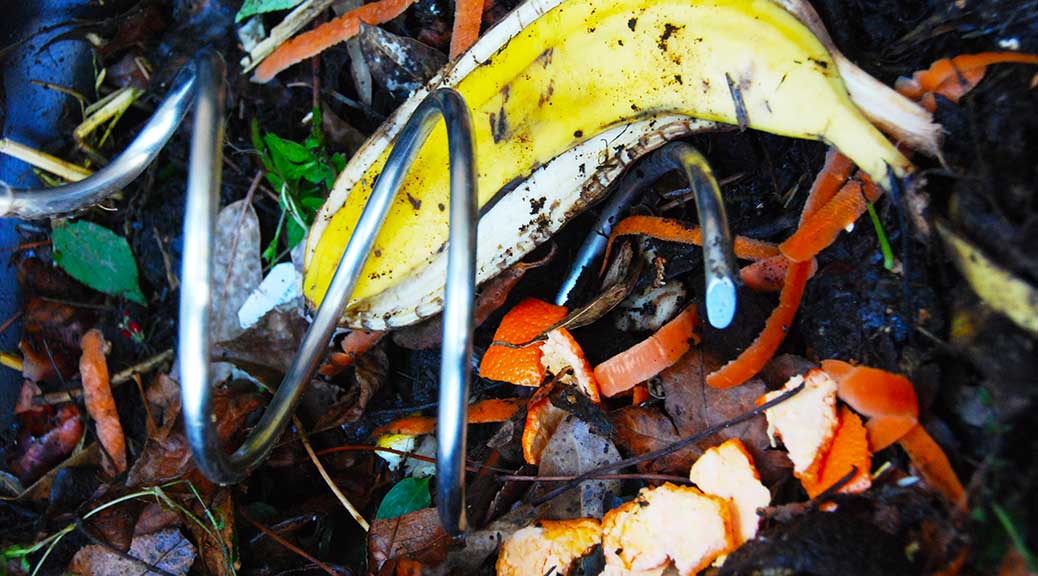
6. Turn your compost regularly

compostturner

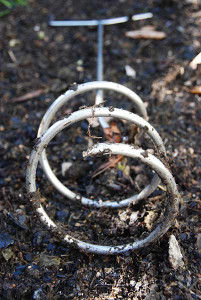
I used to ‘layer’ the different waste and occasionally empty the bin and ‘turn’ the compost with a spade before putting it back in. This was hard work, time-consuming and I didn’t do it often enough. The best, and by far the most useful, tip that I got from the course was to buy and use this compost turner. Turning and aerating the compost is one of the most important jobs, and should be done at least once a week. This brilliantly designed turner makes the job easy and quick. It can reach down to the bottom of the compost to really give it all a thorough mix. The team at Kimbriki Eco House make and sell these stainless steel ones. They have a stall at my local farmer’s market, where they give free advice to help inspire people. They also sell the turners and a few other useful composting and gardening supplies. I know that hardware shops sell a similar compost turner, which would probably work fine, but it may be made from a softer metal and may bend out of shape. turningcompost1
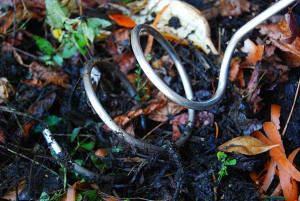
I have no idea if these turners are sold outside of Australia; there are probably some similar ones out there. If you can’t find one, perhaps try asking a blacksmith to make you one! There is no comparison between this and a spade.

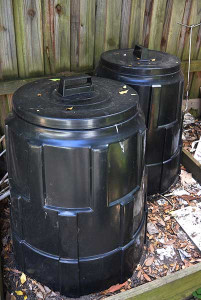
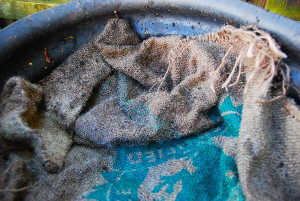
7. Keep your compost covered

hessiumsack

Your compost bin should be sealed with a lid, to stop unwanted predators, such as rats, from getting in. If you find they are burrowing in from underneath you may need to place your bin on concrete, or place a metal sheet at the bottom. To help keep it dark and moist (which also keeps the worms happy) it is a good idea to place some cloth material on top of the compost. I use old hessian sacks which I can buy from my local garden centre. But and old tea towel or old cotton jumper would work just as well. Be warned though, they will eventually need replacing, as the worms enjoy munching their way through them too!

Good luck with your composting and please let me know if any of these tips have helped you.

More composting stories coming soon!

A Story of Smells and Successes

Junior Rambles enjoys checking and turning the compost. I am so glad that he seems as interested and fascinated as I am at how our ‘waste’ turns into new soil for the garden.

I love the idea of of reducing the waste I put in the rubbish bin by putting kitchen scaps into a compost bin instead, but I have tried and failed many times with compost over the years. Open piles or sealed bins just didn’t break down their contents, but they were successful in being smelly. I tried again about three years ago when I found a discarded compost bin in the hedge of our property. I read up on the internet and borrowed library books to search for advice. I tried a layering technique, mixing dry carbon (leaves, twigs etc.) with grass cuttings/kitchen scraps. It was my first success, but it was over a year before the contents had broken down enough to vaguely resemble ‘compost’. Even then I was finding bits that hadn’t broken down; corn cobs, avacado skins, etc.

Last year I noticed my council were offering a free composting course that I could go on, called The Art of Composting and Worms. I have to admit I was slightly skeptical, not sure how much I was likely to learn on a free council course, but thought I had nothing to lose so decided to sign up and go along. 

IMG_1921

I was wrong. I learnt a lot. Of course, I couldn’t see the ‘scraps’ breaking down into compost during the course, I only had their word for it that if I followed the techiniques I had been taught it would work. Less than a year later I have managed to produce several bins worth of kitchen scraps and garden waste into compost! It takes me a matter of weeks now, instead of months/years!

I will keep you in suspense for now, but I promise to write soon about what I learnt and how I do it!