Tag Archives: featured

Roasted Tomato Sauce

Its been a fantastic summer here for tomatoes and my first year of growing them in a greenhouse has been far more successful than I had anticipated – we have so many!  There’s a limit to how many fresh tomatoes one family can eat and friends and neighbours have had their fill. Even though we are now well into autumn, the plants keep on providing. Not wanting to waste any of these delicious fruits we have been finding new ways of cooking them.

This is our favourite recipe (so far) for our glut of tomatoes. The sauce can be eaten straight away and also freezes well for a future meal.

• Slice the tomatoes in half and place them in a layer at the bottom of an oven proof pan. You can make several layers, depending on the amount of tomatoes you have and the size of your pan.

• Add several cloves of garlic to each layer, along with some chunks of butter and sprinkle salt over. If you have some fresh basil leaves, they can be added too.

• Place in oven at about 180ºC for about an hour (or longer) until they start to caramelise. It is a good idea to open the oven door occasionally to let moisture out and to give the tomatoes an occasional stir.

• When you think that they are roasted enough, remove from oven and allow to cool a little.

• Using a blender (I have a hand one) blitz the tomato mixture. If there are tough skins still present then you can pass it through a sieve to create a smooth sauce.

Note: this sauce is fairly concentrated – a little goes a long way.

• Serve over your favourite pasta with a sprinkling of cheese.

Yum.


Composting Continues

Once we had moved into our new house, I couldn’t bear to throw away any vegetable peelings etc., so I automatically started a compost bowl in the kitchen. As it was summer and keeping an open bowl in the kitchen indefinitely wasn’t going to be a good idea, I quickly had to sort out somewhere to put compost in the garden. I kept checking the local ‘Freecycle’ group and eBay in the hope someone would have a compost bin they no longer wanted – but initially had no luck. I looked at compost bins for sale in local hardware shops, but they weren’t what I wanted and were also rather pricy.

I decided to try something new (and cheaper) by buying a plastic rubbish bin, with a tight fitting lid,  then drilled several holes in the bottom and around the lower edges, and I had a new homemade compost bin! I really had no idea what I was doing – I’d looked up some ideas on-line and seen differing ideas and opinions on whether holes were required. I decided it was worth a go.

I don’t know whether it was because the weather is wetter in England than Australia, or because of the nature and shape of the bin, but to start with my compost was very wet and cloggy and formed ‘lumps’; it was nothing like the texture I had in Australia. Perhaps, not having the wider bottom design (as on most commercial compost bins) may have caused the problem.

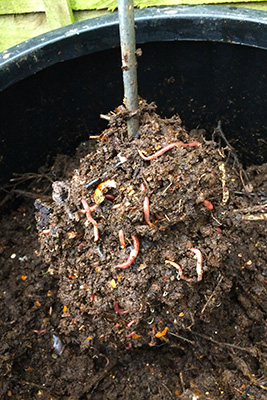
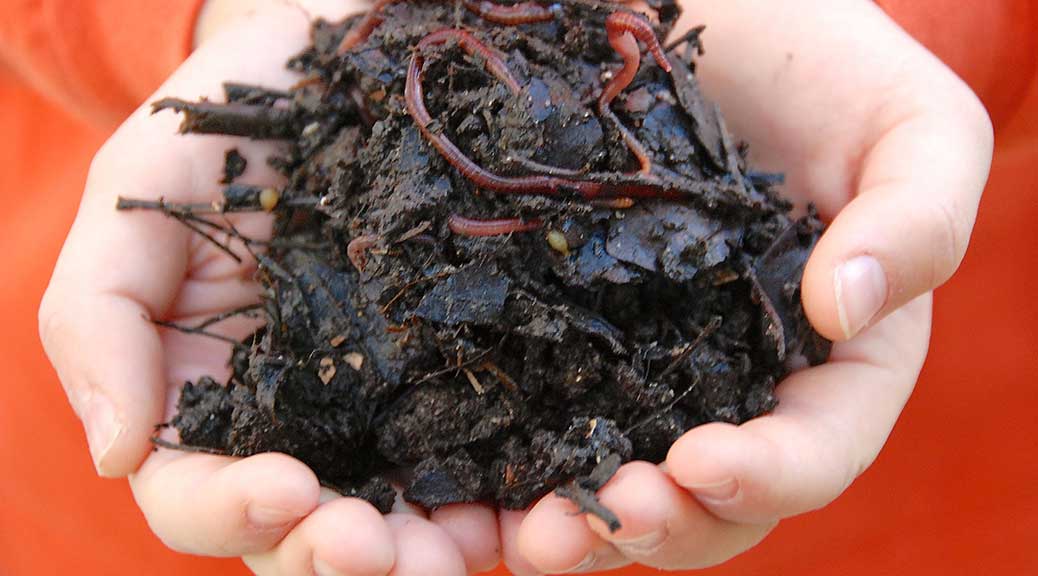
I added some compost worms, used my trusty turner and muddled on. In the meantime I found a second hand compost bin for sale nearby. When I went to collect it was rather larger than I had realised or wanted (I just managed to fit it in the car) but I was pleased to have it and started putting the compost in that one, while l continued to turn the compost in the ‘bin’. It did eventually, after the winter, resemble an acceptable ‘compost’ which I used in the garden.

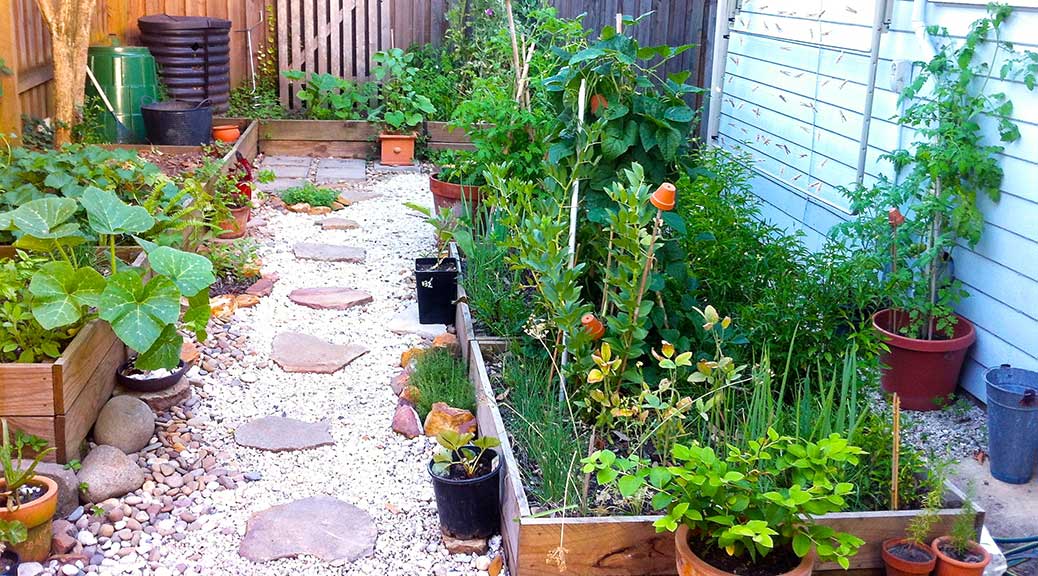
I now have three identical compost bins on the go (Christmas present – thank you Granny and Grandpa Rambles!) which are working brilliantly. I still have the ‘bin’ as a back up extra, and although it is a little small and not quite the right shape, it did seem to work as an alternative compost bin.

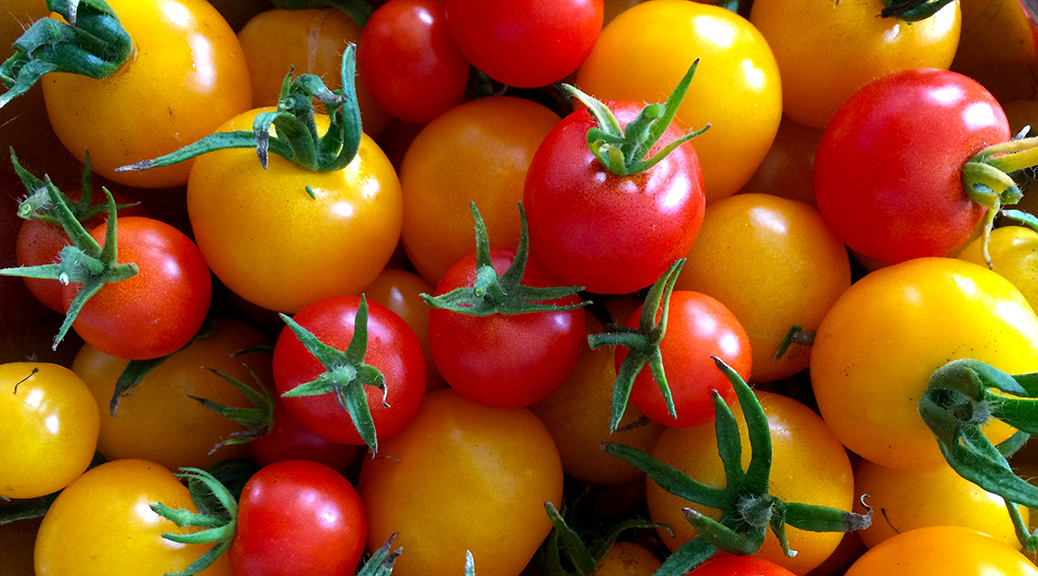
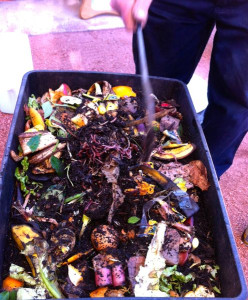
If you would like to discover what I put in my compost bins, have a look at twitter #thingsIputinmycompost

Bluebells at Enys

Last week I visited Enys Gardens here in Cornwall and saw a spectacular display of bluebells.

I had heard that this was an amazing place to view a ‘carpet’ of bluebells and it didn’t disappoint. Whilst living in Australia I have missed the spring flowers of the UK countryside (although Aus. has its own fair share of flora delights)  – perhaps bluebells most of all. I was lucky with the weather – the sun shone for my entire visit. I am so glad I went as I discovered a really interesting place.

Enys House and the Gardens have a fascinating  history (which you can read about here:-  www.enysgardens.org.uk) . The house has not been lived in for many years and has seen a lot of neglect.  Now, along with the gardens, it is in need of care and restoration which is slowly being achieved by its current owners. 
My visit was primarily to see the bluebells but the rest of the garden was just as interesting, seeing both the cleared areas under restoration and the slightly wilder areas still to be tamed. I wandered into the flower garden where amongst a wide variety of plants there were beautiful magnolias and many types of wisteria in flower.

There is a recently planted orchard, where Cornish varieties of apples are being grown and a  New Zealand garden (with plants brought over by a previous family member who  had been living in New Zealand before inheriting the property).

Ambling down a hillside path took me to the ponds where I saw masses of bright pink primulas and watched as a robin caught a dragonfly.

I found walking around Enys a very ‘uplifting’ experience; especially after such a long, wet winter. It has inspired me to get out and about more and inspired me to write more on my website.


I’m Back

After two recent and huge life changes for my family – which have involved the big upheaval of a move back to the UK from Australia,  followed by a year of dealing with serious health issues for Dr Rambles, we are all beginning to settle into and adjust to our new lives in Cornwall. I now feel ready to start rambling again.

Our home is now a small terraced house in a village near the south Cornish coast and we have realised that the garden is, sadly, too small for chickens. We miss our ‘girls’ who gave us so much pleasure (and eggs) in our garden in Sydney. When we moved in, the garden was rather uninspiring, mostly a small lawn and fence with a few oversized shrubs; but, Dr Rambles and I are currently in the process of transforming it into a backyard of raised beds for growing food and flowers – ramblings on that to follow soon.

Cornwall is a beautiful county to live in  with stunning beaches and landscapes to explore as well as many historic houses and gardens to visit. I am looking forward to sharing some of my ‘out and about’ adventures.

I am still loving cooking and baking and have recently been enjoying experimenting and learning how to make different types of pastry. I am also ‘back’ on Twitter and often ‘tweet’ as I bake. More recipes to follow soon.

Muesli Slices

mueslionboard
As most muesli bars contain nuts and I have an anaphylactic (a severe allergy to nuts) son, Master Rambles sometimes feels left out when other children have muesli bar ‘treats’ in their lunch boxes. Recently he saw an advert for a new range of ‘nut free’ muesli bars and asked if I could buy some for him. I saw them in the supermarket and, without really thinking it through, bought them. It was only when I got home that I read the ingredients and discovered that these ‘healthy’ bars were full of preservatives (which is another ingredient Master Rambles has to avoid). Junior Rambles and I tried them, and they were fairly tasteless anyway, and I wasn’t too impressed with the excessive amount of packaging.
muesliingredients
To try to alleviate Master Rambles’ disappointment I decided to make some of our own and, slightly to my surprise, my first attempt was a success. While it would be fine to use supermarket ingredients, I bought organic and preservative-free ingredients from a local health shop – slightly more expensive than the supermarket but all the ingredients together still cost less than the packaged muesli bars!

So here is my, very simple, recipe for nut-free, preservative-free and packaging-free muesli slices.

    • Melt 100g butter in a small pan with 75g of golden syrup and 50g of brown sugar.
mueslimix
    • Meanwhile, in a mixing bowl, combine 100g wholemeal self-raising flour, 80g of rolled oats, 50g of sulphite-free dried apricots (chopped), and 25g each of pumpkin seeds, sunflower seeds and preservative-free shredded coconut.
    • When the butter and sugar mixture has melted and dissolved, stir through the dry ingredients.
mueslicooked
  • Transfer the mixture into a baking pan (mine is 8″x8″) and cook at 170C for about 20 minutes.
  • Once out of the oven let the mixture cool for about 10 mins before turning out onto a cooling rack.
  • Allow to cool completely before cutting into desired shapes and sizes. It is difficult to cut when hot as it is very crumbly (I have tried, and failed).


Perfect in a lunch box, or enjoyed anytime with a cuppa!

mueslicut

Vanilla Sponge Cake with Pear and Cream Filling

This is not actually my own original recipe, I ‘borrowed’ it from Mr Rambles. I have had several requests for the recipe recently, so here it is, reproduced by kind permission. Thank you Mr R.

When Master Rambles was on his strict elimination diet he couldn’t enjoy Mr Rambles’ lemon sponge cake, so I changed it to a vanilla sponge and filled it with cream and the only fruit he was allowed, pears. It was an instant hit, and has now become our family’s favourite cake. For a special occasion, for a not so special occasion, or for when it just feels like a cake sort of day!


cakepearslices
  • Cream together 125g softened butter and 220g castor sugar with a teaspoon of vanilla essence
  • Add 2 eggs to the mixture and beat
  • Add 75g of self-raising flour and mix until smooth
  • Add another 150g of self-raising flour and a pinch of baking powder
  • Mix until smooth
  • Pour in 125mls of milk and mix until smooth
  • Divide into two lined 8″ cake tins and cook at 150C for about 40 mins (until a knife comes out clean)
  • Carefully remove from tins and place on a cooling rack
    cakeready
  • When the cakes are cool enough, add some whipped fresh cream to one half, and top with sliced pears. I use very ripe or tinned ones.
  • Place the other half on top
  • Enjoy. Goes down exceptionally well with a cup of tea!
    eatcake2

Creating the Kitchen Garden

boots
As well as a larger area of garden at the front (where the chickens live) we are lucky to have a small, north facing, patch of garden just outside the kitchen door. When we moved in this consisted of; a ‘sooty mould’ infested Lilly Pilly hedge, a scrappy patch of grass with a washing line, and a well worn deck. After several failed attempts at curing the hedge of its black leaves, I decided to pull the whole thing out. What a great decision, it made the garden much bigger, and lighter.

edible1
I had wanted to grow veggies and herbs here, but had tried in pots for the first two years, with not a great deal of success. Now we had more space I enlisted Mr Rambles’ help in building raised beds around the fence boundary where the hedge had been, and in the central grass area where we had moved the washing line from. The washing line is now attached to the side of the house, where it can be folded away, takes up much less space and gets more sun.

edible2
Since putting the veggie beds in I decided that the rest of the garden would be created from found and reused materials only. It is still changing and evolving and has now become one of my favourite outdoor spaces to spend time in. I have had various failures and sucesses with my edible plants, and I am still experimenting and learning what, when and where to grow. Last summer we enjoyed some of the best successes yet, including chillies, cherry tomatoes, beans, spinach, spring onions, beetroots, potatoes, pumpkins and various different herbs.

A Story of Smells and Successes

Junior Rambles enjoys checking and turning the compost. I am so glad that he seems as interested and fascinated as I am at how our ‘waste’ turns into new soil for the garden.

I love the idea of of reducing the waste I put in the rubbish bin by putting kitchen scaps into a compost bin instead, but I have tried and failed many times with compost over the years. Open piles or sealed bins just didn’t break down their contents, but they were successful in being smelly. I tried again about three years ago when I found a discarded compost bin in the hedge of our property. I read up on the internet and borrowed library books to search for advice. I tried a layering technique, mixing dry carbon (leaves, twigs etc.) with grass cuttings/kitchen scraps. It was my first success, but it was over a year before the contents had broken down enough to vaguely resemble ‘compost’. Even then I was finding bits that hadn’t broken down; corn cobs, avacado skins, etc.

Last year I noticed my council were offering a free composting course that I could go on, called The Art of Composting and Worms. I have to admit I was slightly skeptical, not sure how much I was likely to learn on a free council course, but thought I had nothing to lose so decided to sign up and go along. 

IMG_1921

I was wrong. I learnt a lot. Of course, I couldn’t see the ‘scraps’ breaking down into compost during the course, I only had their word for it that if I followed the techiniques I had been taught it would work. Less than a year later I have managed to produce several bins worth of kitchen scraps and garden waste into compost! It takes me a matter of weeks now, instead of months/years!

I will keep you in suspense for now, but I promise to write soon about what I learnt and how I do it!